When you want to pack your product, sealing the stand-up pouch the right way is crucial to keep the contents fresh, safe, and presentable to customers. But many people wonder, “Where exactly should I seal the stand-up pouch?” Sealing it correctly ensures that the product remains intact, and it also adds to the attractiveness of the packaging.
Sealing a stand-up pouch isn’t just about closing it; it’s about doing it right to protect what’s inside while keeping the appearance professional. In this guide, we’ll talk about where you should place the seal on your stand-up pouch and what to keep in mind while sealing. This way, your product remains fresh, secure, and easy to handle, which is crucial for both the manufacturer and the customer. Let’s dive right in.
What Is the Best Area to Seal a Stand-Up Pouch?
When you are sealing a stand-up pouch, you want to seal it at the top, just above the tear notch. The tear notch is the small cut or indent on the sides of the pouch, allowing customers to open it easily. When the pouch is filled with the product, sealing above the tear notch leaves enough room to make opening simple without damaging the resealable part if one exists.
Sealing above the tear notch also ensures that the bag remains airtight, preventing moisture, air, or other contaminants from getting in. It also keeps the contents fresh for a long time. You want to leave about half an inch to one inch of space from the top of the pouch for the seal, depending on the size of your pouch. This spacing helps maintain the pouch’s shape and ensures that the seal is strong enough to hold the contents without bursting.
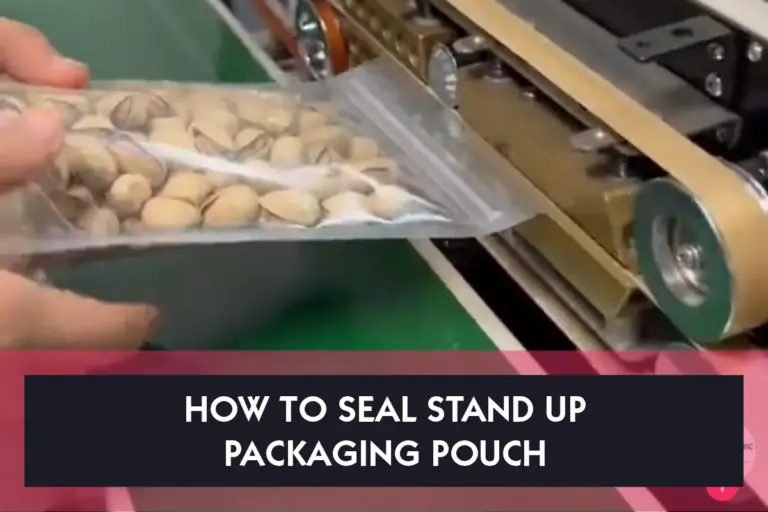
Using the Heat Sealer Correctly
A heat sealer is commonly used to seal stand-up pouches, and it’s essential to know how to use it properly. As we mentioned before, the sealing bar should be placed just above the tear notch. Make sure the seal is even across the top to avoid any weak spots.
It’s important to adjust the temperature based on the material of your stand-up pouch. For example, if you’re using a plastic pouch, the heat should be hot enough to melt and bind the plastic but not too hot that it burns the material. Most heat sealers come with adjustable temperature settings, so be sure to set the temperature based on the thickness and type of material.
Proper Spacing for Resealable Stand-Up Pouches
If your stand-up pouch has a resealable zip, it’s important to leave enough space between the zip and the seal. Typically, you should leave around half an inch between the top of the resealable zip and the heat seal. This gap helps make sure the bag can be easily torn open above the zip, and customers can then use the resealable feature.
If you seal too close to the zip, customers may struggle to open the pouch or may accidentally tear the zip, making the resealable feature useless. Proper spacing ensures easy access and a better user experience.
Maintaining a Consistent Seal
A consistent seal means sealing evenly across the top of the pouch without gaps or wrinkles. When sealing, make sure that the pouch is placed flat on the sealing surface. Wrinkles or folds can lead to incomplete seals, which may allow air or moisture to enter the pouch. This could damage the contents or shorten their shelf life.
To avoid this, double-check that the top of the pouch is straight and smooth before sealing. If your pouch has side gussets (folds on the sides), ensure that they are folded properly, and the top is even. A consistent seal not only keeps the contents safe but also looks professional and appealing to customers.
Testing the Seal
After sealing the stand-up pouch, it’s a good practice to test the seal. A quick and easy way to test it is by applying slight pressure to the top of the pouch. If air escapes or you notice any openings, the seal might need to be redone. This simple step ensures that every pouch is properly sealed, preventing any issues during storage or transportation.
Another way to test the seal is by conducting a vacuum test, which helps determine whether the seal is airtight. If the pouch holds up during the vacuum test without collapsing, then you’ve got a strong seal. Testing the seal will reduce the chances of product returns or complaints due to faulty packaging.
Importance of Leaving Headspace
When filling your stand-up pouch, it’s important to leave some headspace before sealing. Headspace is the empty space left between the top of the product and the seal. Ideally, you should leave about one to two inches of headspace. This ensures that there is enough room to create a proper seal without the product interfering.
Without enough headspace, the contents may spill into the sealing area, leading to a weak or messy seal. This is especially important for powdery or granular products, which can easily get stuck and prevent the seal from forming properly. Enough headspace helps in creating a clean and secure seal every time.
Factors to Consider When Sealing
There are a few important factors to keep in mind when sealing your stand-up pouch:
Material Type: Stand-up pouches are made of different materials like plastic, foil, or paper laminates. The material will determine the right temperature and sealing time. Make sure you understand the material to adjust your sealer settings accordingly.
Product Type: Consider the product you’re packing. For instance, liquid products may require a stronger seal compared to dry products. This will help you determine the sealing strength needed.
Seal Width: The width of the seal also matters. A wider seal (around 8-10 mm) is recommended for heavy products or products with sharp edges. This reduces the risk of the seal bursting during handling or shipping.
Tools You Need for Proper Sealing
To ensure that you’re sealing your stand-up pouches properly, having the right tools is essential. Here are some of the basic tools you might need:
Heat Sealer: A good quality heat sealer is key. Choose one with adjustable temperature settings and a sealing bar that matches the size of your pouch.
Measuring Tools: Use measuring tools to ensure that you’re leaving the right amount of headspace and sealing at the correct position.
Pouch Holder or Jig: For high-volume packaging, a pouch holder or jig can help hold the pouches in place during sealing. This ensures consistency and speeds up the process.
Conclusion
Sealing a stand-up pouch properly is crucial for maintaining product quality, ensuring safety, and providing a great experience for customers. The best place to seal a stand-up pouch is just above the tear notch, leaving enough space to ensure easy opening while maintaining a secure seal. Use a heat sealer set at the appropriate temperature based on the material of your pouch, and always leave some headspace to make sure the seal is clean and strong.