When it comes to food packaging, providing essential information like the batch number, manufacturing date, and expiration date is crucial for both manufacturers and consumers. An expiration date ensures that consumers and customers know the specific timeframe a product remains fresh and safe to eat. For businesses, especially small-scale manufacturers, knowing how to stamp the expiration date on packaging like stand-up pouches is important for maintaining compliance with food safety standards and building trust with customers.
Stand-up pouches are commonly used in the food industry for products like snacks, coffee, or dried fruits because they are durable, easy to store, and offer excellent protection against moisture and air. However, printing or stamping the expiration date on these pouches requires the right tools and techniques to ensure the information is clear, legible, and long-lasting. In this guide, we will walk through the process of stamping expiration dates on stand-up pouches in a straightforward way.
How To Stamp Expiration Date On Stand-Up Pouch
Step 1: Choose the Right Type of Printing or Stamping Method
There are several methods available to print expiration dates on stand-up pouches, and choosing the right one depends on the type of material, production volume, and budget. Here are some of the most common methods:
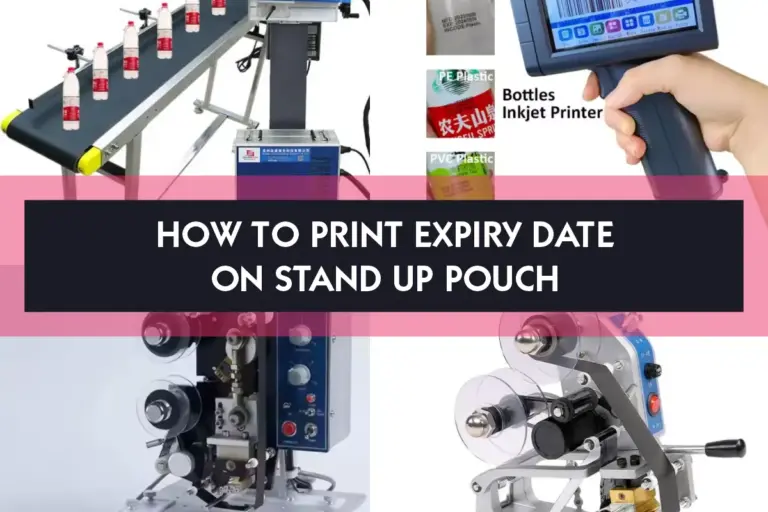
1. Thermal Transfer Printing

This is one of the most widely used methods for printing expiration dates on flexible packaging like stand-up pouches. A thermal transfer printer uses heat to transfer ink from a ribbon onto the packaging surface. This method is suitable for high-volume production as it provides fast, clear, and durable results. Thermal transfer printers are easy to operate, and the ink dries quickly, ensuring that the print doesn’t smear.
2. Inkjet Printing

Inkjet printing is another popular option for marking expiration dates. It works by spraying tiny droplets of ink directly onto the pouch surface. Inkjet printers are versatile and can be used on various packaging materials like plastic, paper, and foil. They are ideal for medium to high production runs, and you can adjust the size and style of the printed expiration date to match your branding. However, it’s important to ensure that the ink used is food-safe and adheres well to the pouch material.
3. Hot Stamp Coding

Hot stamp coding involves using a heated die to stamp the expiration date onto the pouch. This method is more common for small to medium-scale production because it is cost-effective and doesn’t require advanced equipment. However, the process is slower compared to thermal transfer or inkjet printing, and it is usually best for short runs or specialized products.
4. Laser Marking

Laser marking is a high-tech solution for stamping expiration dates on packaging. It works by using a focused laser beam to create marks on the surface of the pouch. Laser marking is extremely precise, permanent, and ideal for large-scale production. Although it requires a larger initial investment, laser marking ensures high-quality results and can handle high-speed printing demands.
Step 2: Ensure Proper Alignment and Placement
Once you’ve chosen the appropriate printing or stamping method, the next step is to ensure the expiration date is placed correctly on the pouch. Proper placement is key to making sure the information is easy to find and read by customers.
Here are some general guidelines for placement:
- Visible Area: The expiration date should be printed in a location where it can be easily seen and on a white background. Avoid placing it near the edges where it may be accidentally cut off or difficult to find. Typically, the upper or lower part of the back of the pouch is an ideal spot.
- Consistent Positioning: If you’re printing expiration dates on multiple pouches, ensure that the positioning is consistent across all packages. This helps maintain a professional appearance and makes it easy for customers to locate the date.
- Legibility: Make sure that the font size and style are clear and readable. The expiration date should stand out from the rest of the text on the pouch, so avoid using fancy fonts or very small sizes that may be hard to read.
Step 3: Test the Durability of the Print
Before starting full-scale production, it’s important to test the durability of the expiration date stamp. This step ensures that the print stays intact throughout the product’s shelf life and while being handled by customers.
Here’s how you can test the durability:
- Scratch Test: Lightly scratch the printed area with your fingernail or a sharp object to check if the ink rubs off. If it does, you may need to use a different ink type or adjust the printing pressure.
- Moisture Test: Stand-up pouches are often exposed to moisture during storage or transportation. Spray a small amount of water on the expiration date and see if the ink smears. If the ink runs, consider using a waterproof ink or a different printing method.
- Heat and Cold Test: Place the pouch in both hot and cold environments to check if the expiration date fades or distorts. This is especially important if your product will be stored in extreme temperatures.
Step 4: Maintain Regulatory Compliance
Each country has its own set of regulations regarding food labeling, including how expiration dates should be displayed on packaging. In most regions, the expiration date must be printed in a standard format (e.g., DD/MM/YYYY) and be clear and easy to read.
To ensure compliance:
- Check Local Laws: Research the labeling requirements in the region where your products will be sold. This might include the format of the expiration date, the language used, and additional information like batch numbers.
- Use Food-Safe Inks: If you’re using ink-based methods like inkjet or thermal transfer, make sure that the inks are certified food-safe and won’t contaminate the product.
- Batch Printing: Some regions require that batch codes and other tracking information be included alongside the expiration date. Make sure that your printing or stamping method can accommodate this additional information.
Step 5: Maintain Your Equipment
To avoid production delays and ensure that the expiration date is always printed correctly, it’s important to regularly maintain your printing or stamping equipment.
Here are some maintenance tips:
- Clean Print Heads: If you’re using a thermal transfer or inkjet printer, clean the print heads regularly to prevent clogs and ensure clear prints.
- Replace Worn Parts: Over time, parts like ribbons, dies, and nozzles can wear out and affect print quality. Regularly inspect and replace these parts as needed.
- Calibrate Your Printer: Periodically check that your printer is properly calibrated to avoid misaligned or distorted prints. This is especially important if you’re printing on pouches of different sizes or materials.
Step 6: Choose the Right Materials for Stand-Up Pouches
Different materials may affect the way expiration dates are printed. Stand-up pouches can be made from various materials like plastic, aluminum foil, and paper laminates. Each material has its own characteristics, and some may require special inks or settings to ensure that the expiration date adheres properly and remains visible.
For example:
- Plastic Pouches: Most expiration date stamping methods work well on plastic, but make sure the ink or heat used doesn’t cause any damage to the pouch itself.
- Foil Pouches: When using foil materials, it’s important to choose a printing method that can handle the reflective surface without smudging or fading.
- Paper-Based Pouches: These are often more absorbent, so ensure the ink dries quickly and doesn’t bleed into the material.
Stamping expiration dates on stand-up pouches may seem like a simple task, but it requires attention to detail and the right tools to ensure that the information is clear, durable, and compliant with regulations. By choosing the right printing method, ensuring proper alignment and placement, and maintaining your equipment, you can ensure that your packaging not only looks professional but also meets the highest standards for food safety and quality control.
Thermal transfer printing, inkjet printing, hot stamp coding, and laser marking are all viable methods for stamping expiration dates on stand-up pouches. Whichever method you choose, make sure the print is legible, durable, and correctly positioned on the pouch. Don’t forget to regularly test your equipment and prints to maintain quality throughout the production process. Ultimately, stamping expiration dates correctly will help you meet regulatory standards and build trust with your customers.